If you love flaky pastry and have missed classic French pastry since going gluten free, you will want to dive right into this gluten free pastry recipe. It makes incredible pastries!
This post may contain affiliate links. Please read our Disclosure Policy.
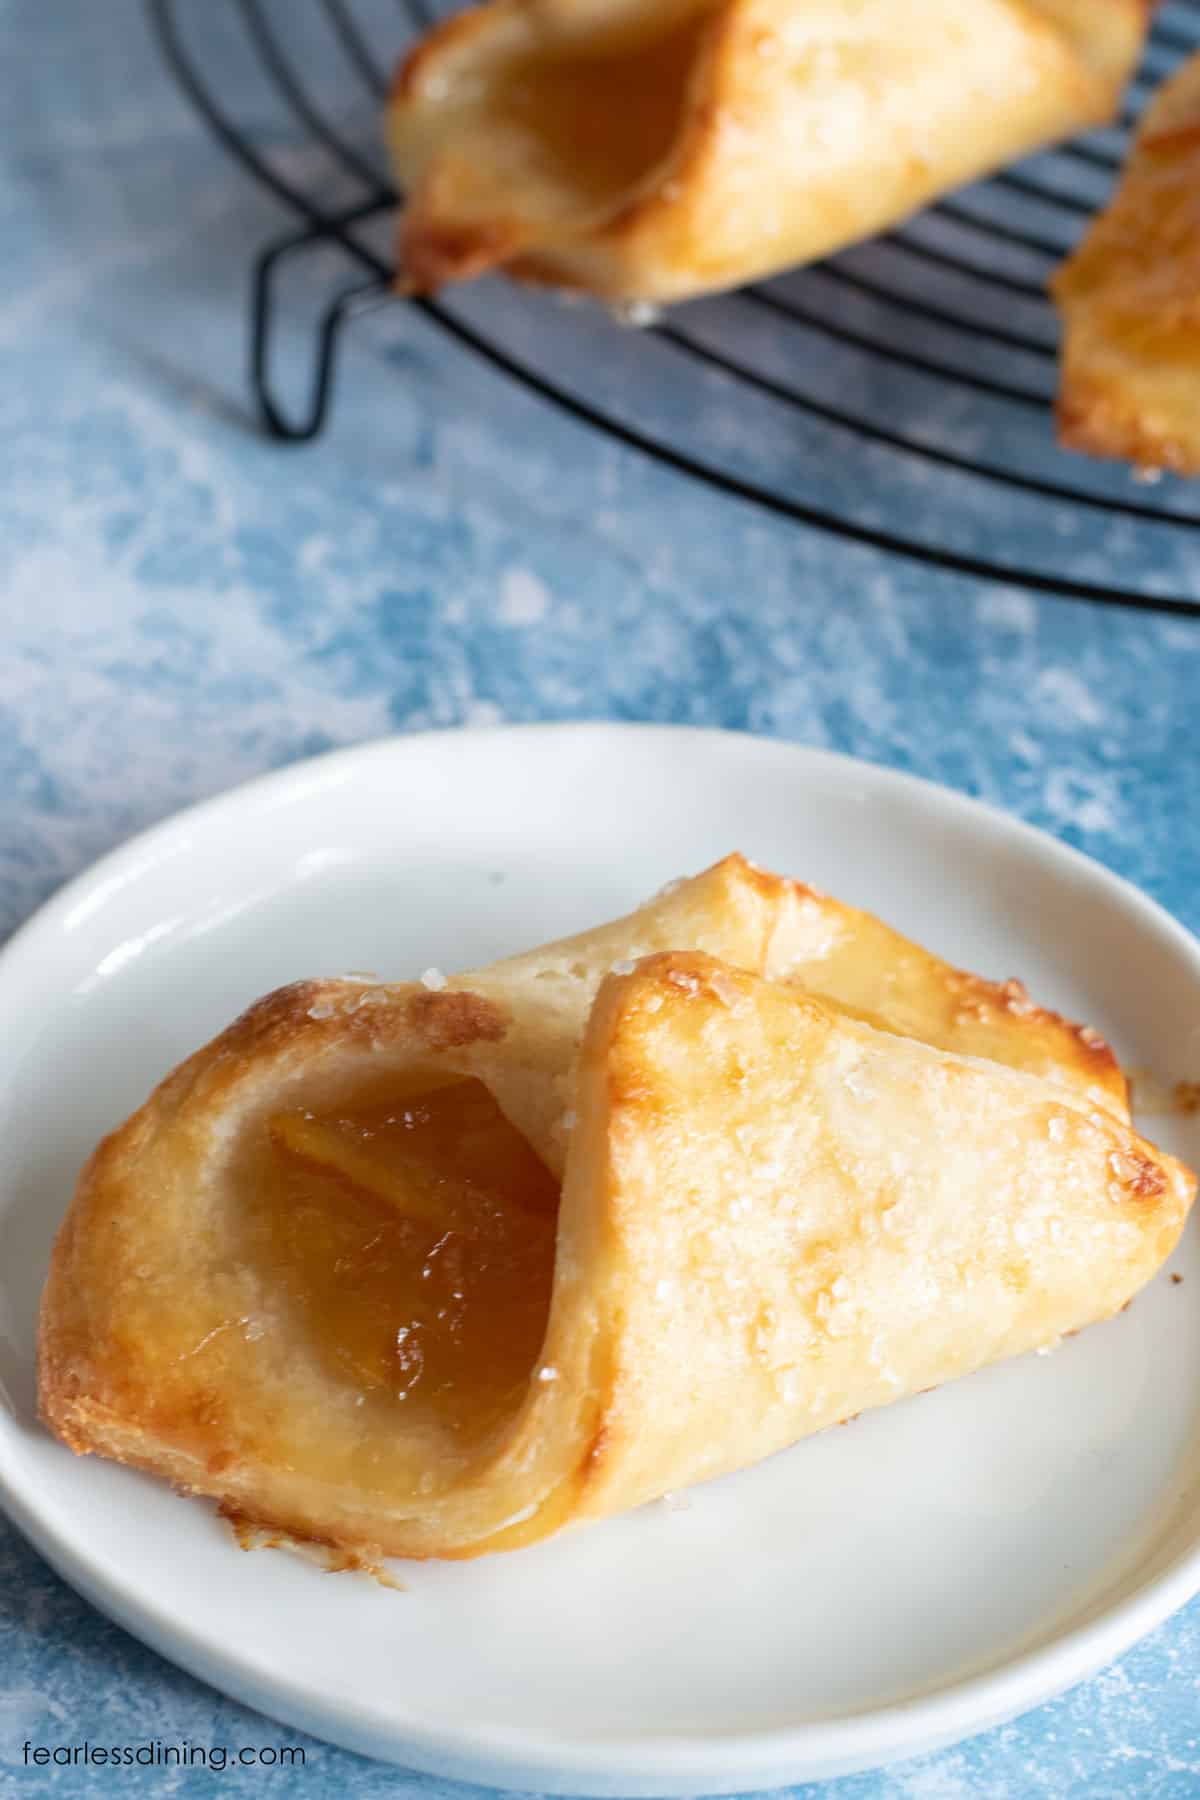
Those three words don’t seem to go together at all. Flaky. Pastries. Gluten free. It seemed daunting and complex, and it was silly of me to assume this would be a hard baking project!
I assure you that making gluten free pastries is easy, and the results are worth all of the steps. These pastries are great for dessert or any time of day!
If you love French desserts, here are two more delicious gluten free recipes to make your mouth water: Fool-Proof Gluten Free Apple Cake and Gluten Free French Apple Cakes.
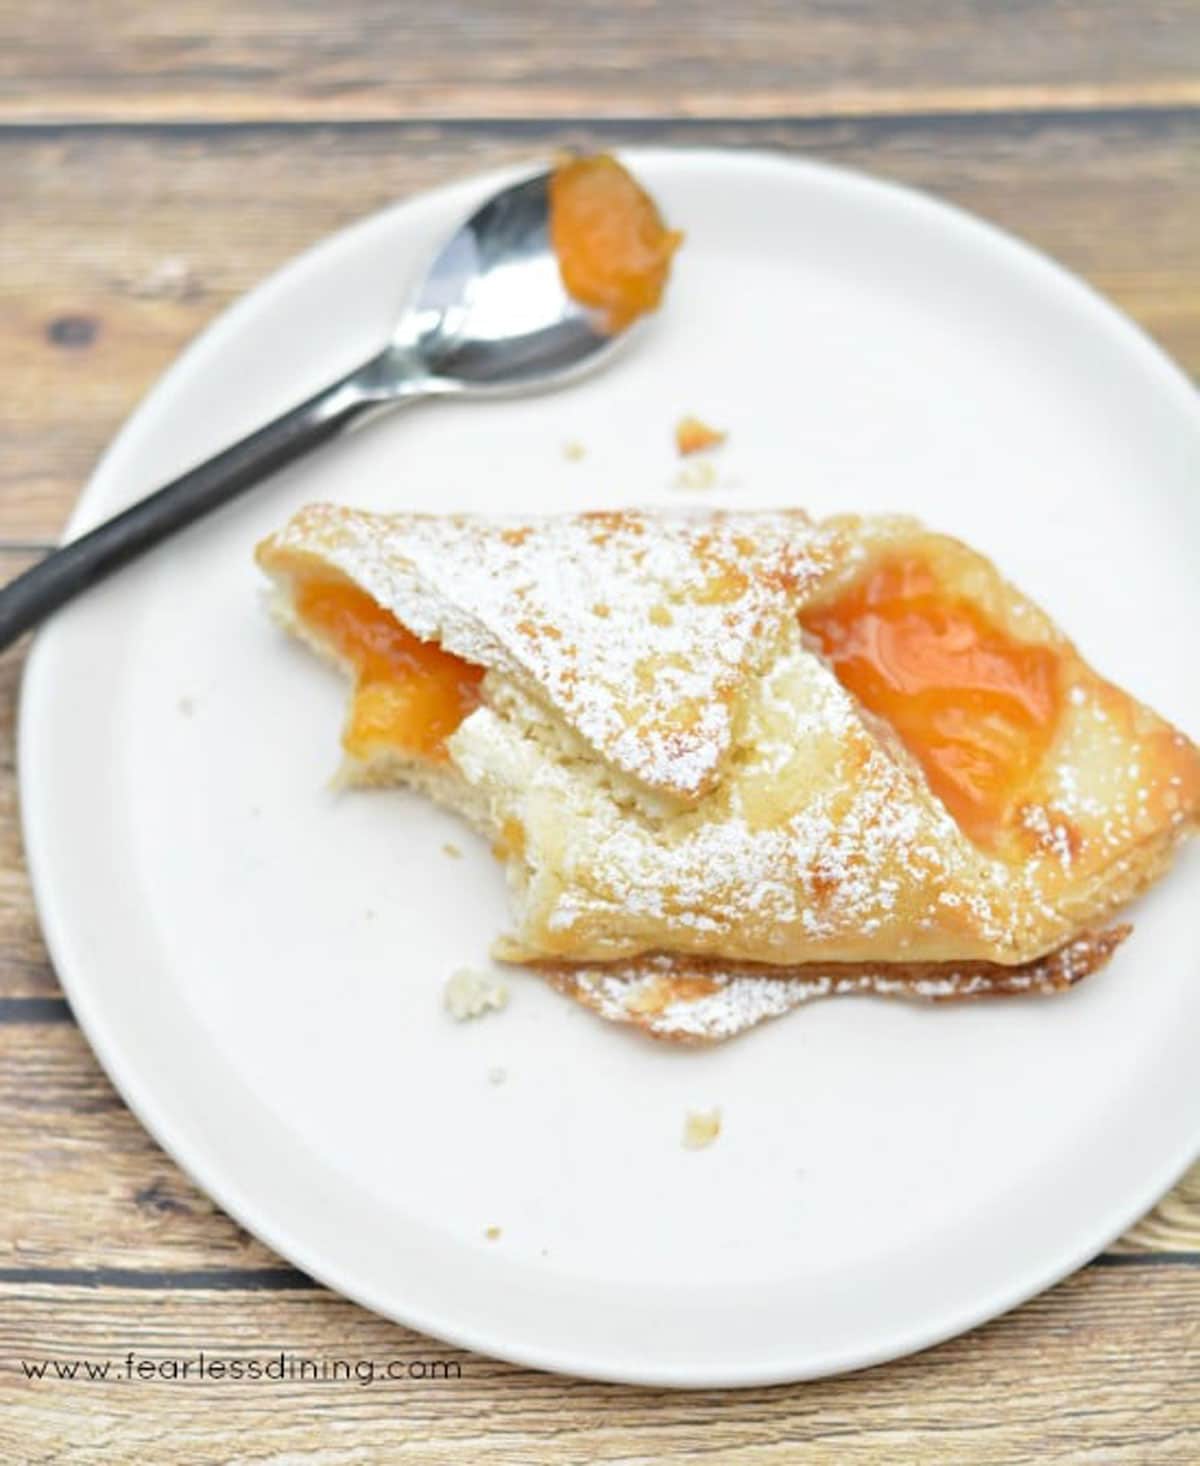
Why we love this gluten free pastry recipe:
- You get mouthwatering flaky pastries that are gluten free.
- This recipe is for a gluten free rough pastry, which is a little easier than using a big block of butter.
- You can shape my pastry dough any way you like to make many delicious shapes with lots of filling options.
- Fill them with anything you want!
- You can freeze the dough and make the pastries later.
This is not a recipe for those in a hurry. Making this pastry dough has a lot of steps to get the flakiness into the dough. There are a lot of photographs of each step, so you can see in detail how to make this recipe.
Allergen Information:
These homemade pastries are gluten-free, oat-free, soy-free, and egg-free (if you skip the egg wash.)
Trust me, it is worth it. If you LOVE this gluten-free pastry recipe, wait until you try my Gluten-Free Cheese Danish recipe!!
This recipe is delicious. We used it for a lemon blueberry tart type thing and then used it this weekend as a pie crust for a mixed berry pie, and it was very good. I got sidetracked and overcooked the crust, so it got a little hard on me, but the taste was on point. I rolled them out on parchment paper, put an egg wash on top, topped them with cinnamon and sugar, and baked them to crispy, and that was also so good! Glad we stumbled upon your page because your recipes have been so good! Thanks for sharing all you do.”
naomi m.
Flour Blends Tested:
1. King Arthur Measure for Measure—This blend works really well in my recipes. I don’t have to let the flour blend rest in the batter.
2. Cup4Cup—This blend also works well, but this flour blend does benefit from resting the batter for 15 minutes before baking. The rest allows the rice flour in this blend to soften, so you don’t have gritty baked goods.
Ingredients Notes:
For the full list of ingredients and amounts, please go to the recipe card below.
- Gluten Free Flour Blend – I preferred Cup4Cup, but note this blend has dried milk powder. If your gluten free flour blend doesn’t contain xanthan gum or guar gum, please add 1 teaspoon.
- Baking Powder – Use aluminum-free! You can also read more about which baking powder is gluten free.
- Butter – Use high-quality unsalted butter. It should be VERY cold.
- Eggs – Use size large
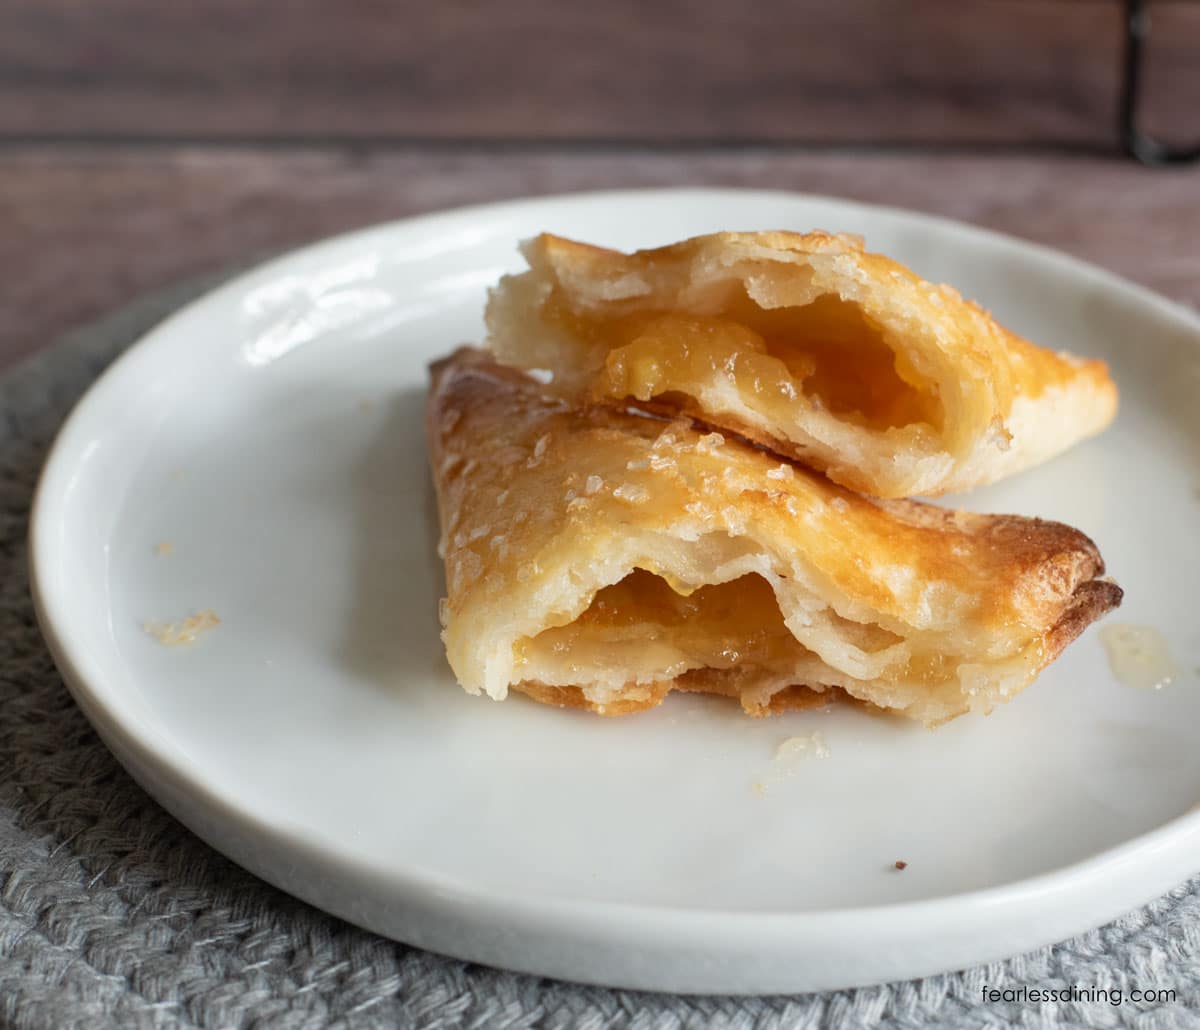
Tips For Success
1. Freeze the butter. It makes things so much better when your butter is cold!
2. Use ice water without the ice cubes. Your mantra for this easy gluten free rough pastry recipe is cold. Cold butter is what makes those flaky layers!
3. Depending on your gluten-free flour blend, you must really dust your surface and the top of the dough before rolling. I needed to do this more with the Cup4Cup than the King Arthur Measure for Measure. Every gluten free flour blend is different, so use flour as needed to prevent the dough from getting too sticky.
4. Refrigerate your dough between every step when you laminate your gluten free puff pastry dough!
How To Make Gluten Free Pastry:
Are you ready to see how to make this gluten free flaky pastry dough step by step? Grab a rolling pin; you will need it to laminate the pastry dough. This is what makes all of the buttery layers!
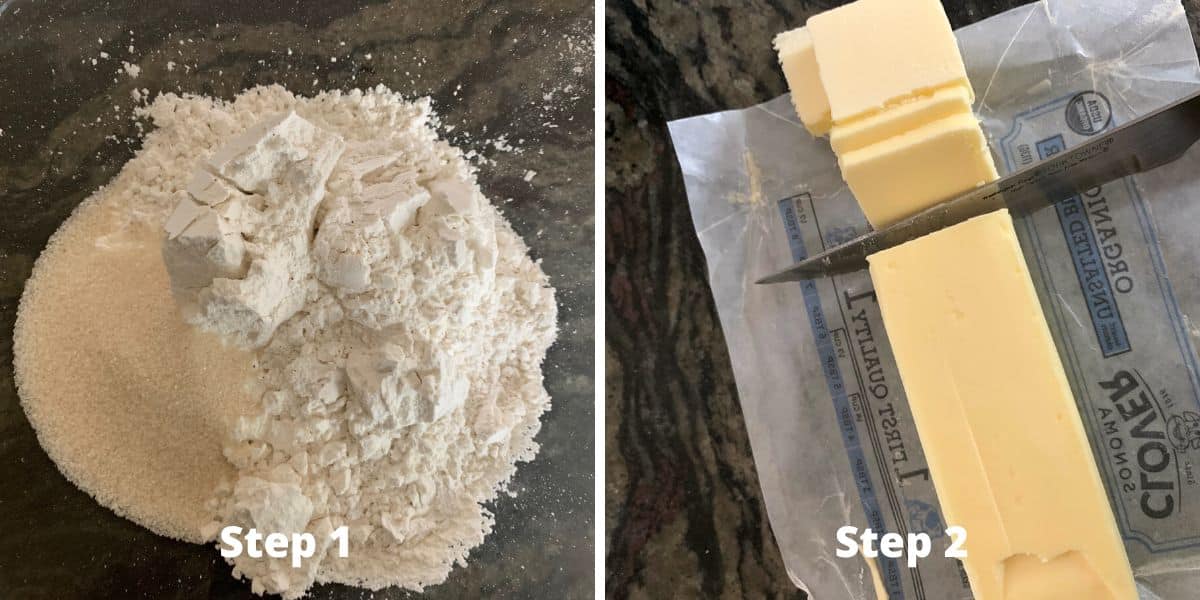
Step 1: Add the dry ingredients to a bowl and whisk to blend.
I recommend using the spoon or leveling method to measure your gluten-free flour.
Put the measuring scoop into the flour and fill. Do not pack the flour. Use a knife to scrape along the top to remove the extra flour. You can also use a spoon to fill the measuring cup. Use a knife to level along the top to remove the extra flour.
Step 2: Chop the stick of butter into chunks. The colder the butter, the better, so try not to touch the butter with your fingers.
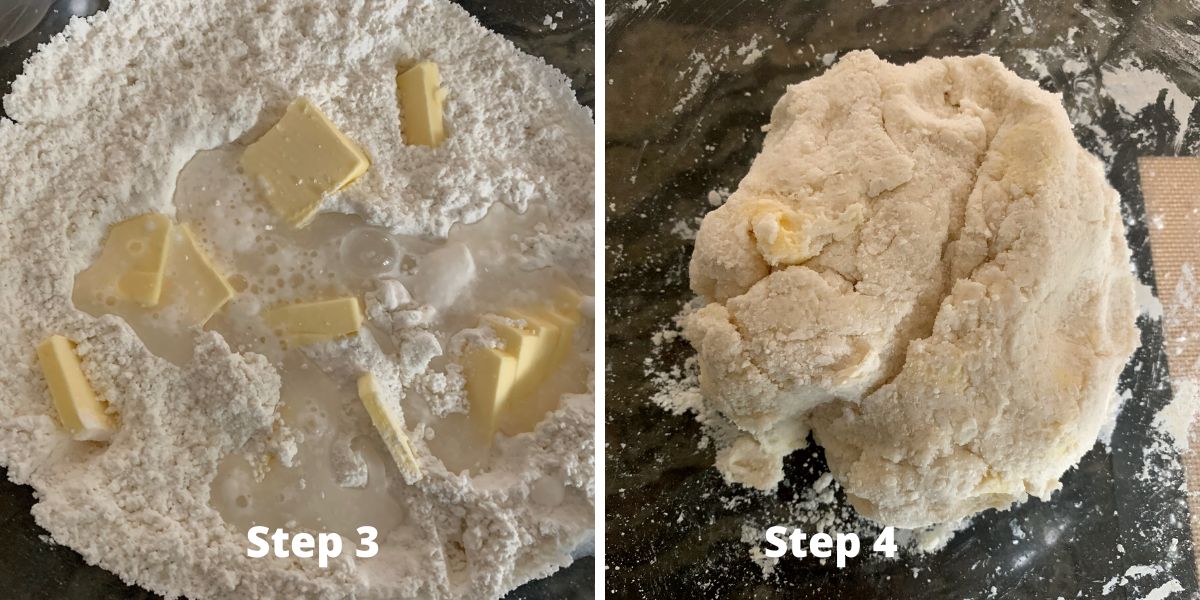
Step 3: Pour the cold water into the dry ingredients and add the cold butter chunks. Mix until your mixture forms a dough.
Step 4: Seeing the large butter chunks in the dough is okay.
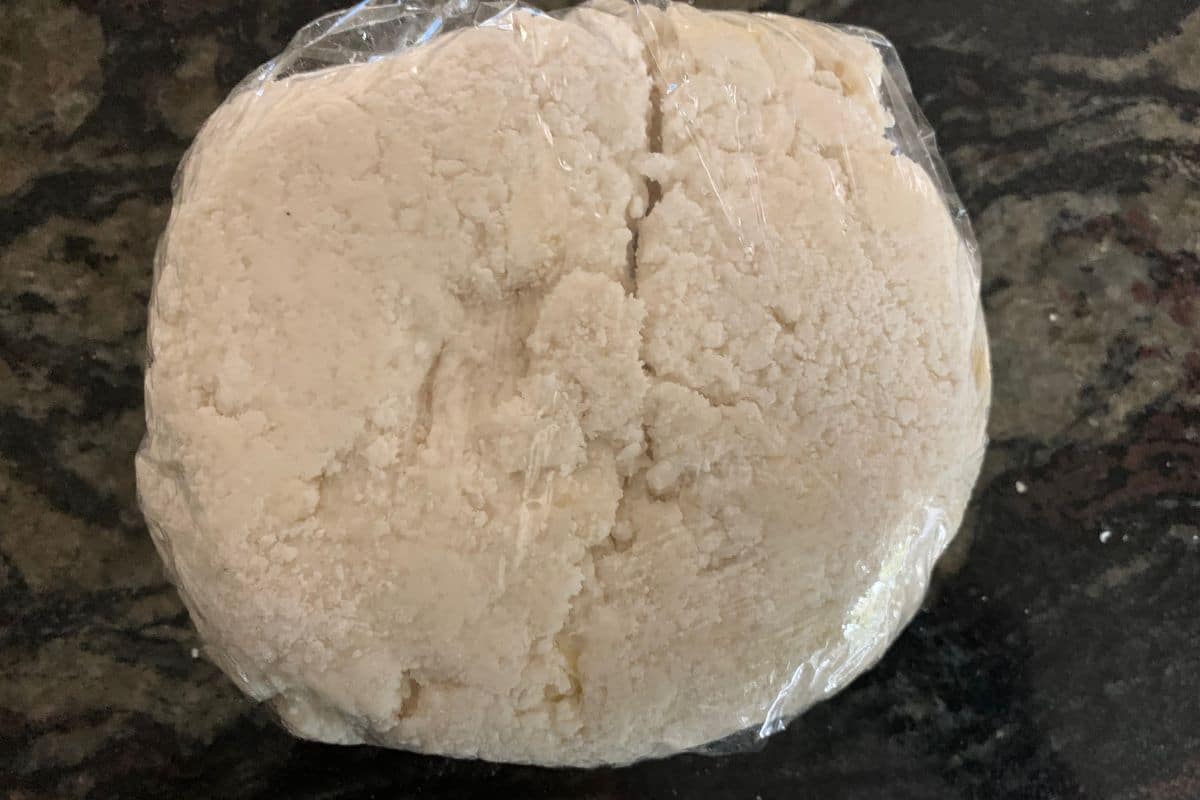
Step 5: Wrap the dough in plastic wrap and pop it into the refrigerator for 30 or more minutes.
Email This Recipe To Me!
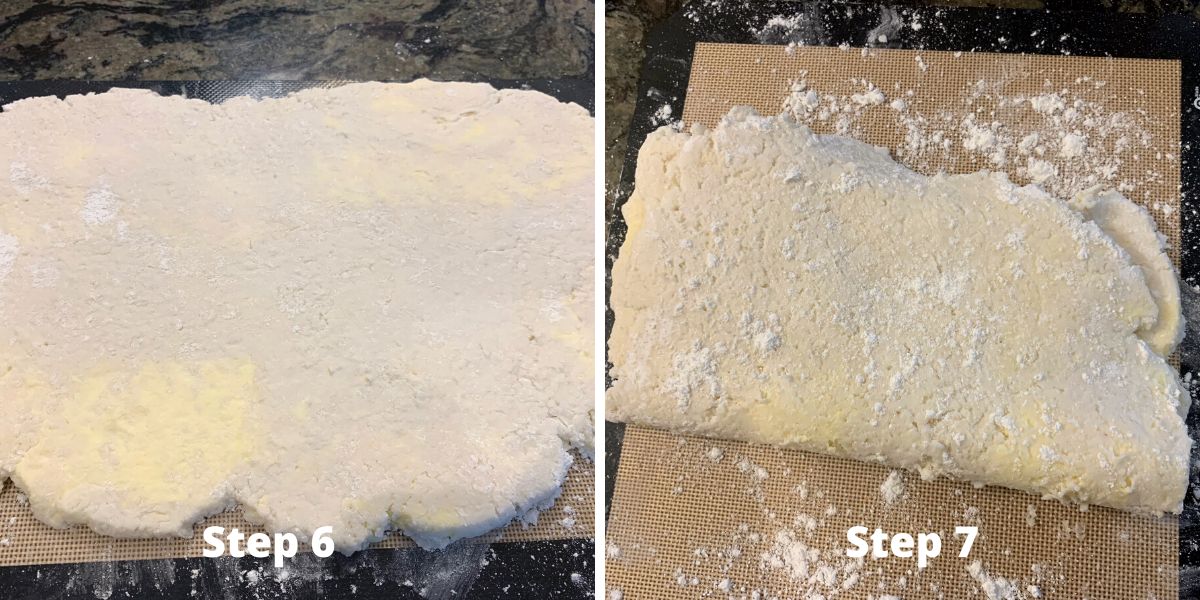
Step 6: Now it is time to laminate your gluten free puff pastry dough. This process is how those big chunks of butter work into the dough in thinner pieces. This is the magic behind creating those flaky layers.
Place the dough onto a gf flour dusted surface. Roll to 1/4 inch thickness.
Step 7: Fold one side of the dough up past the middle, as I show in the photo above, in what is called a two-letter fold. Then, fold the other end over the first fold. The key is to cover the butter and nestle the dough around it.
We are going to repeat this process a lot. Each layer breaks up the butter into thin bits mixed into the dough. Think of the thin areas of butter creating pockets of flaky layers.
Step 8: Fold the two-fold envelop folded dough in half again. Wrap in plastic wrap and refrigerate for 30-45 minutes.
Remove the dough from the refrigerator and repeat steps 6 and 7. Repeat the refrigeration. Repeat the roll, fold, and refrigerate 4 times.
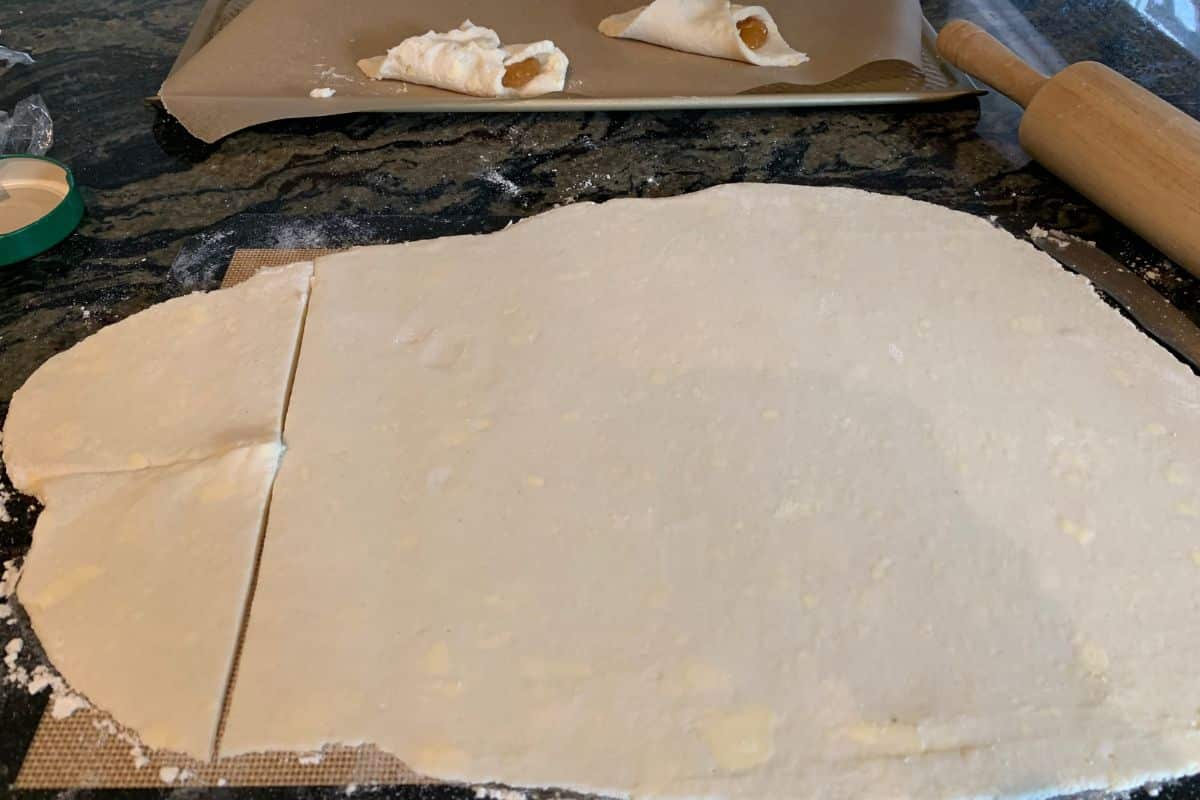
Step 9: Dust the silicone mat or surface with flour and roll your pastry dough to 1/4 inch thickness. Use a sharp knife to cut the dough into rectangles.
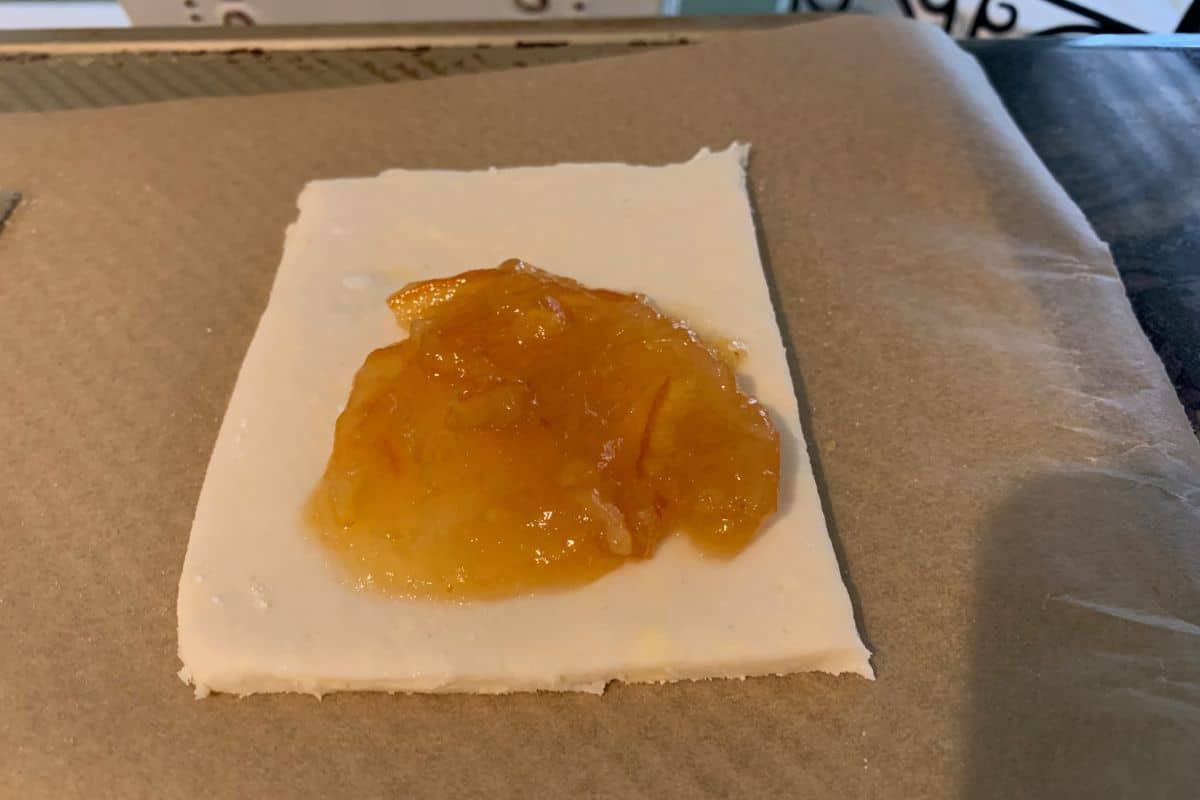
Step 10: Cut the dough into the desired shape and add the filling. This one has orange marmalade. You can use any jam, fresh fruit, pie filling, or chocolate!
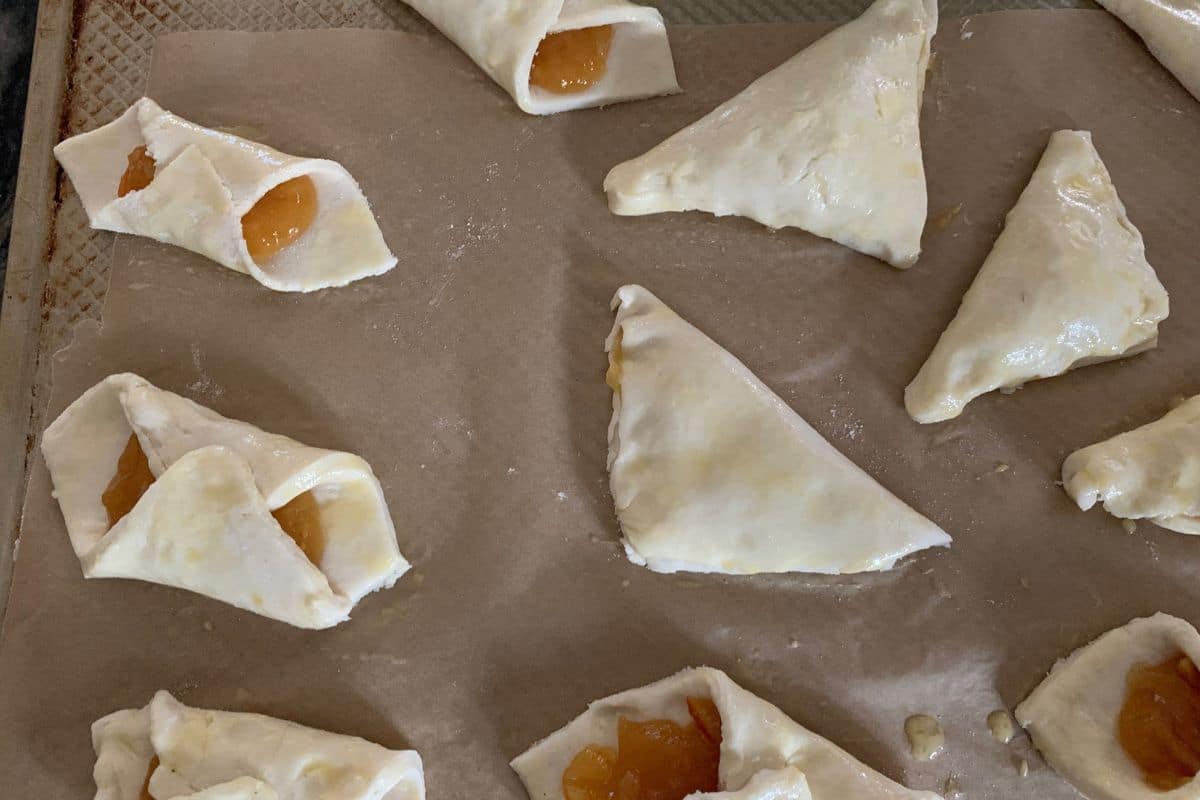
Step 11: Roll or fold the dough over the filling. Here are two folds I did with my pastry. Next, brush each with an egg wash. Bake at 400º F for 15-20 minutes. The baking time will vary by the size of the pastries.
What To Do With Dough Scraps:
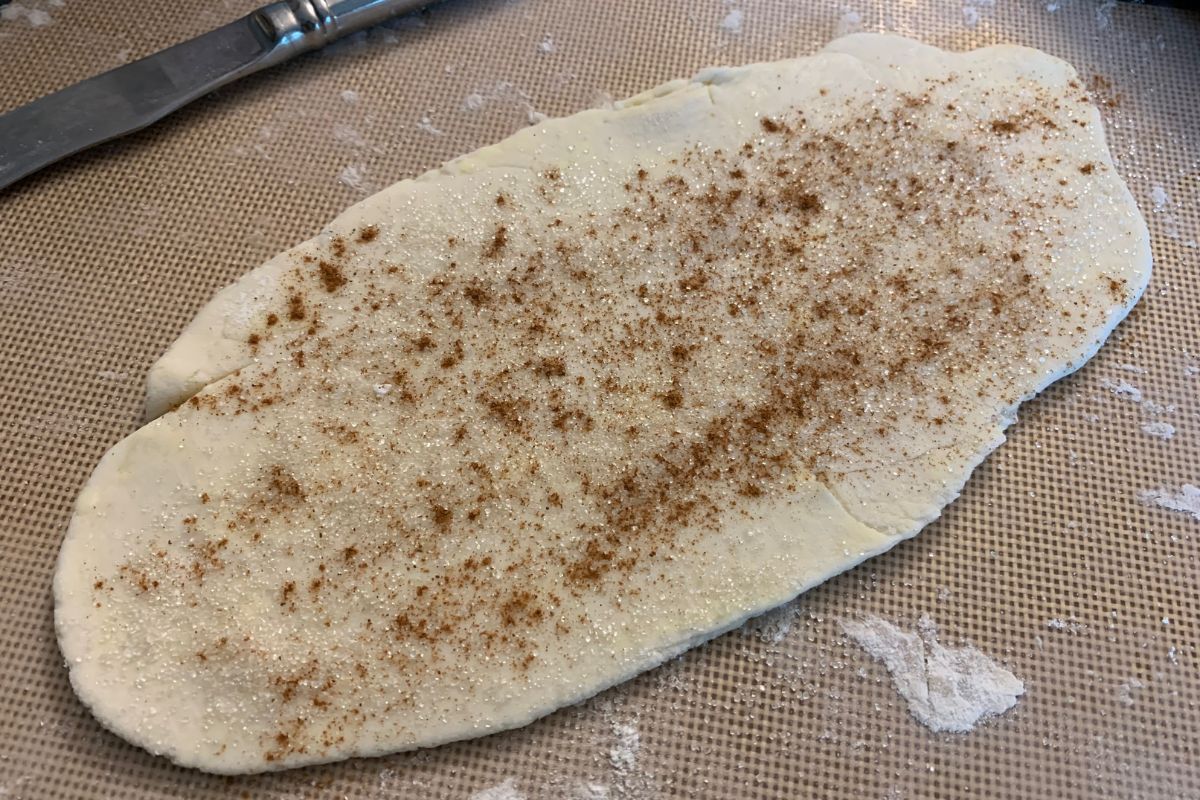
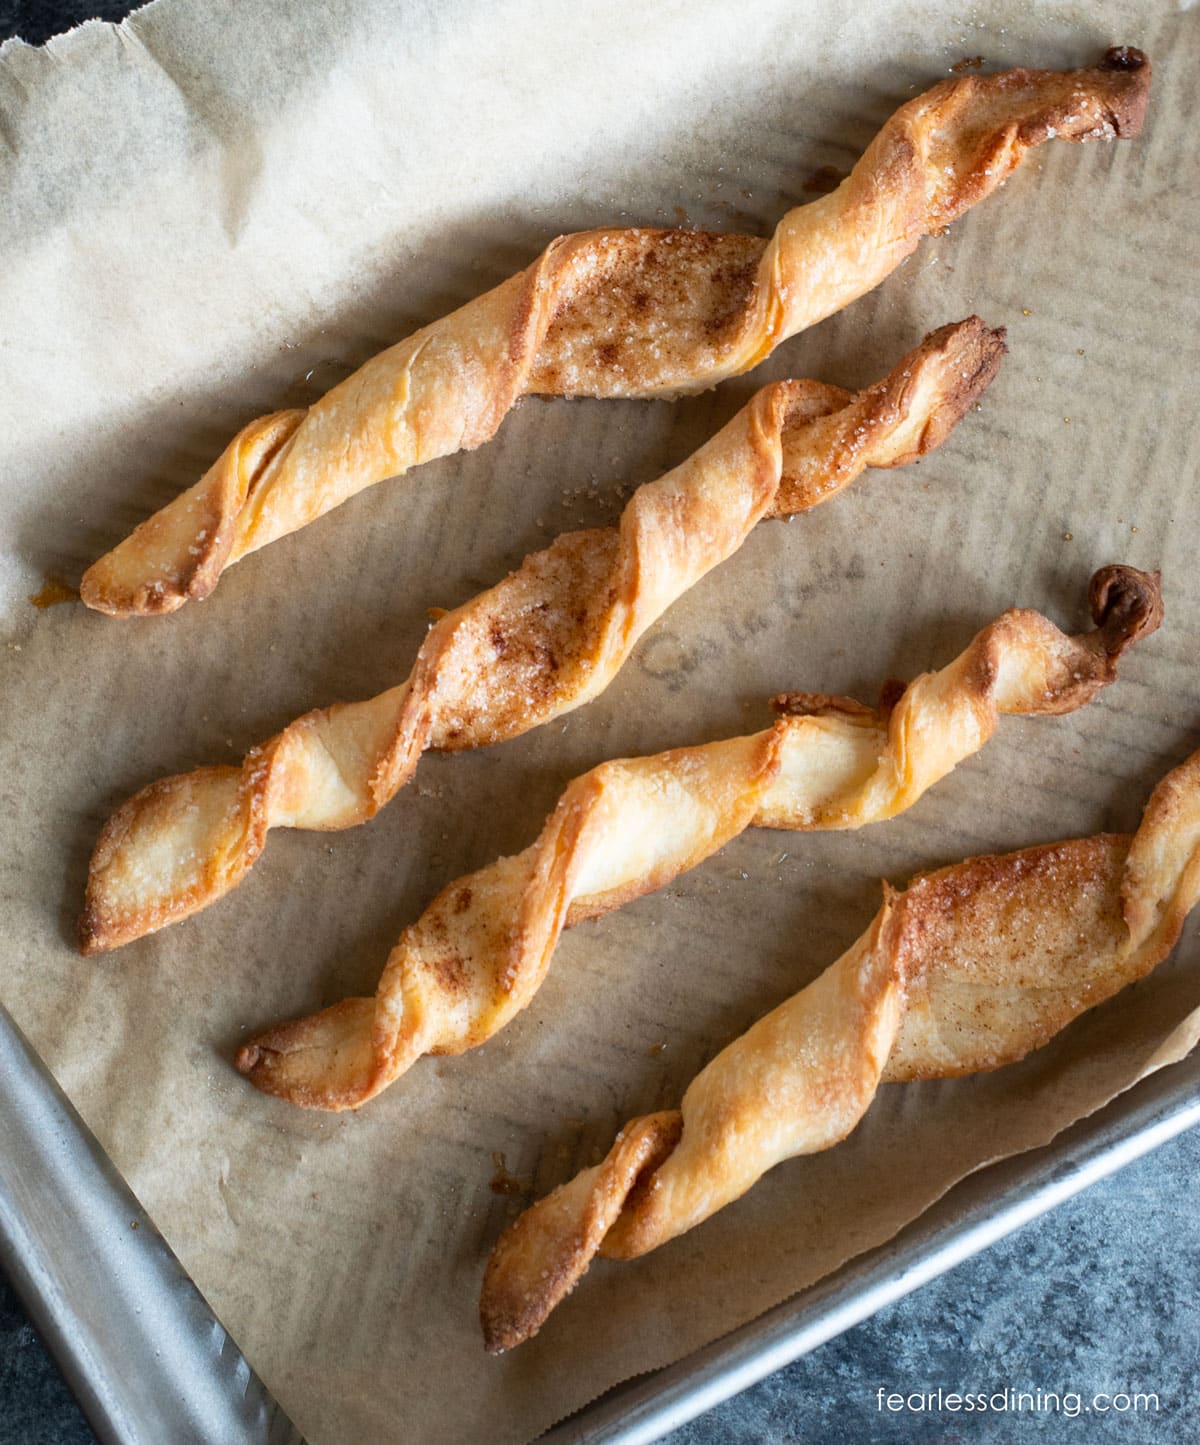
Step 12: You will inevitably have dough left over. Usually, the scraps are from the rounded parts not used when cutting the dough. Roll the scraps and then sprinkle sugar and cinnamon over this dough.
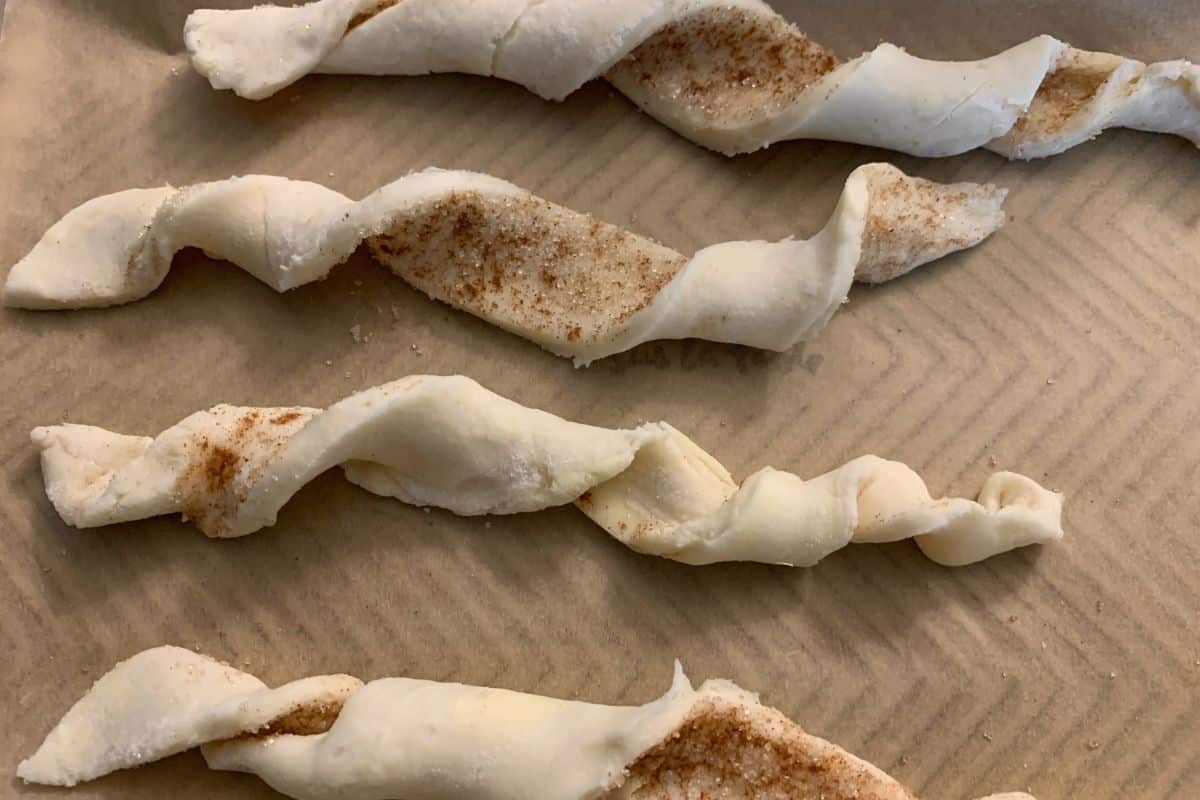
Step 15: Cut the dough into strips and twist them. Bake for 12-15 minutes, depending on the size of your pastries. Remove from the oven and allow cooling.
Pastry Fillings Ideas:
- Jam (I like jam better than jelly because jam has fruit pieces in it.) If you love jam in pastries, try my Gluten Free Kolache recipe!
- Nutella
- Chocolate chunks
- Cream cheese
Optional….dust the gluten free pastries with powdered sugar.
Frequently Asked Questions:
Unfortunately, the secret to the flaky pastry is the butter, so I do not think this recipe would work well dairy-free.
These pastries will keep fresh for up to 4 days in an air-tight container or up to 4 months in the freezer.
Yes! After the lamination dough process, wrap the dough in plastic wrap, then place that into a freezer bag. Thaw the dough and shape your pastries when you are ready to use the dough.
Feel free to contact me via my contact page, and I will send it to you. I decided although the older version of my recipe with active dry yeast is really good, gluten free dough only gets one good rise. Because this recipe needs a LOT of rolling and chilling, the yeast served no purpose.

More Gluten Free Dessert Recipes:
- These Gluten Free Cream Puffs are an incredible dessert!
- If you love cinnamon rolls, these Gluten Free Cinnamon Rolls are so good.
- Melt in your mouth Gluten Free Vanilla Kipferl Cookies are very popular!
- Flaky Gluten Free Blueberry Scones are so easy!
Love This Recipe?
If you made and enjoyed this recipe, I would be incredibly grateful if you could leave a comment below. Please include which flour blend you used. This will help others know this recipe is delicious. Thank you!
Flaky Gluten Free Pastries
Equipment
- Rolling Pin
- Cookie sheet
Ingredients
- 2 ½ cup gluten free flour blend * see note!
- ¼ cup cane sugar
- 1 teaspoon baking powder aluminum-free
- ⅛ teaspoon salt
- ¾ cup cold water you may need more or less depending on the flour blend.
- ½ cup unsalted butter COLD
Filling:
- 1 egg for the egg wash
- Use any filling you like, including jam, Nutella, etc.
Email This Recipe To Me!
Instructions
- Add 2 1/2 cup gluten free flour blend, 1/4 cup cane sugar, 1 teaspoon baking powder, and 1/8 teaspoon salt to a large mixing bowl and whisk to blend.
- Pour 3/4 cup cold water into the dry ingredients, mix, and then add the cold 1/2 cup unsalted butter chunks. Mix until your mixture forms a dough with big butter lumps.
- Wrap the dough in plastic wrap and pop it into the refrigerator for 30-45 minutes.
- Now it is time to laminate your gluten free puff pastry dough. This a rolling and folding process that rolls the big chunks of butter into the dough in thinner pieces.
- Place the dough onto a gf flour-dusted silicone mat. Roll the dough to 1/4 inch thickness. Fold one side of the dough up past the middle, as I show in the photo above, in what is called a two-letter fold. Then, fold the other end over the first fold. The key is to cover the butter and nestle the dough around it.
- We are going to repeat this process a few more times. Each layer breaks up the butter into thin layers in the dough. Think of the thin areas of butter creating pockets of flaky layers.
- Fold the two-fold envelope folded dough in half again. Wrap in plastic wrap and refrigerate for 30-45 minutes.
- Remove the dough from the refrigerator. Preheat your oven to 400º F.
- Dust the silicone mat or surface with flour and roll your pastry dough to 1/4-1/2 inch thickness. Use a sharp knife to cut the dough into rectangles.
- Cut the dough into the desired shape and add the filling. This one has orange marmalade. You can use any jam, fresh fruit, pie filling, or chocolate!
- Fold the dough over the filling, and then brush each pastry with egg wash. Bake the pastries at 400º F for 15-20 minutes. The baking time will vary by the size of the pastries. The pastries will be slightly golden when they are finished baking.
- Remove the pastries from the oven and place them on a cooling rack. Please don't eat them hot because the filling can burn your mouth.
Notes
- I have tested this recipe with the old version of Cup4Cup. That doesn’t mean others will not work; I just have not tested other flours. Most blends should work, but do not use whole grain or heavy grain flour blends because they won’t get as flaky.
- If your gluten free flour blend doesn’t contain xanthan gum or guar gum, please add 1 teaspoon.
- These pastries will keep fresh for up to 4 days in an airtight container or up to 4 months in the freezer.
SPECIAL NOTE
Please know that every gluten free flour blend has a different starch to grain ratio. If you use a blend I didn’t test, my rule of thumb is to add more flour if your dough or batter is wet and add more liquid if the dough or batter is too dry!
Nutrition
Nutrition Disclaimer
Nutritional information is an estimate provided to you as a courtesy. You should calculate the actual nutritional information with the products and brands you are using with your preferred nutritional calculator.
*This post was updated with more detailed recipe directions from my old 2/23/15 post. If you want the older version of my recipe using yeast, please reach out, and I can send it to you.


Hi, can you clarify the recipe please? Do you add all butter and flour that you listed and start kneading and then add more when laminating or you add or you listed a total quantity of butter? If it’s a total quantity then do how much you leave for laminating? Thanks
Hi Kate, There is no kneading in this recipe. If you look at the photos in the recipe post, I show a photo of every step to make this recipe. You use all of the butter, then fold and roll it in multiple times.
Best gluten free pastry I have found yet. I used Bobs Red Mill 1 to 1 baking flour. I used double the water in the recipe to get the mix to become dough. It’s the first one I’ve found that you can actually roll out. My daughter will be ecstatic to have butter tarts for Xmas! Thank you!
Thank you so much for coming back, Debora. I am so glad you loved this recipe. Merry Christmas!
I enjoyed the 2015 version. I actually lost the recipe and lo and behold I found it while going through my stash. is this recipe as delicious and why did you update it????
I’ll assume it’s better. I’m happy I can enjoy these pastries again. I filled mine with apricot and peach preserves. thanks for the yummy-ness
Hi Sandy, I updated it to make it easier for readers who struggle with yeast recipes. I plan to remake this recipe soon and retest it because the flour blend I like Cup4Cup, reformulated and I want to remake it to see if this blend still works.
Hi, this looks great! I have one question though, do you put any butter between the folds when you roll it, it di you add all the butter in the beginning. Also, do you use an electric mixer to mix in the butter, and do you mix it until it’s all incorporated or just partially! Thanks!!
Hi Alexia, I didn’t use an electric mixer. You can mix in the butter chunks, they get rolled thinly, or you can use the pastry blender to do rough larger chunks then roll it multiple times as shown in the photos.
Can you use dairy free butter for these?
Hi Janet, I haven’t tested this particular recipe with dairy-free butter. If you try it, please let me know how it turns out.
Do you have a recipe for better than Robert Redford pudding squares.
Hi Ada, I haven’t heard of these so I did some research. I am sorry to say that I don’t have a recipe similar.
I would like to make a gf sfloglitelle and was wondering if this would be a recipe that would lend itself to adapt to the layers being rolled thin and rolled.
Hi Patricia, I am not sure if this recipe would hold up to very thin layers. I haven’t tried it.
Hi there, just making sure I didn’t misunderstand your Note #1 regarding the flour blend and yeast. Yeast is not used in this recipe right?
Thanks! Hoping to try this soon.
Hi Sherry, when I made this recipe originally, I used yeast, and it will definitely work out well…but I found it isn’t necessary. I changed it to keep it more simple for readers since the flavors turned out the same.
These are AWESOME! I have made them several times, it is my favorite
dessert to make. (And breakfast item).
I am so glad you love the recipe, Nancy. Thank you so much for coming back to leave a review.
Hi! I’m enjoying your posts adn wanting to start trying these pastries which look deliciously delectable! Just got confused about the yeast as this recipe does not include yeast but in the Notes section you mention yeast. How much yeast should we use? Also, am I interpreting the recipe correctly in that you added all the butter slices at once into the flour mix? I’m used to seeing the process of putting some slices in with each fold process instead of all at once. If you’re beautiful results happen without adding some butter with each fold, then I’m truly amazed! So, do we add the butter slices all at once in the beginning?
Hi Renee, If you look in the FAQ, I talk about this. The recipe used to have yeast, but with all of the rolling, the yeast really don’t affect the recipe so I retested the recipe without yeast. It works just as well and this way those who can’t have yeast can enjoy this recipe.
A G F member was recently added to our family. I often have the family for dinner and want to be sure the food is healthy for them. I have never cooked gluten free so I realy need help
Hi Katy, If you go to the New, Start Here tab in my blog menu, many great articles that will help you. I also recommend my Facebook group, Gluten Free Living and Recipe Share to connect with others and get support.
Hi, do you have anything similar to this, and also yeast free, that is savory and could be used for making spanokopita?
Hi Yael, I do not, but maybe if you omit the sugar this recipe could work?
Hi Sandi, this looks amazing! One of the things I really miss the most having to be gluten free is serious yeasted flakey pastry like croissants etc. I was wondering if this dough could be frozen before shaping or baking, as back in my gluten days I use to be able to get frozen uncooked croissants and filled pastries that you could take out of the freezer, let thaw/rise for an hour or so, then bake fresh, and it was so nice to just have one or two pastries hot out of the oven for breakfast on a weekend. Either that or having the dough ready to make into whatever flavor/shape you want, without having to make the dough the same day. Have you tried anything like that before? Thanks a bunch!
Hi Chelsea, I would think that you can freeze the dough. I have not tried it, but my recipes typically freeze well.
Thanks Sandi!
OK thanks! I am making them today so I hope they turn out.
Hi I am a bit confused. It says you let them rise in the oven and then it says to let it rise in the fridge overnight? Another person posted to let it rise a second time in the fridge for 30. Can someone please clarify if the rise should be cool or warm and how much for first and second in a simple list like this:
first rise = 24 hours in the fridge or
first rise = 1 hour in a warm place …?
I do the first rise on the counter, but you can also do it in the refrigerator overnight because it is easier. It really depends on how much time you have, and when you plan to bake them.
Your recipe calls for 1/2 cup of milk. Is this for proofing the yeast or part of the “wet” ingredients? You state that you use milk instead of water to proof.
Hi Karen, I proof the 1/2 cup of milk and to that, after the yeast is bubbly, you add the rest of the wet ingredients to. I hope this helps.
Wondering if a yeast substitute would work. I try to stay away from yeast because it is just a form of fungus.
Hi Bets, I think you need yeast for the rise in order for the flaky layers to form.
You mention a stick of butter , I buy mine in a block so how much is a stick?
Hi Marion, a stick of butter is 1/2 cup. Enjoy 🙂
Made them and they are delicious but wondering if I should of let them rise again after I made them up, also wondering if a hotter temperature would of puff them up more. I had to cook mine at least about 20 minutes.
Good question. I will test the hotter temp the next time I bake them. Thank you Marion 🙂
How long do you leave it in the fridge for the second rise?
Hi, about 30 minutes should be enough.
I have Authentic Foods Multi Blend flour on hand, think it will work the same? It’s known as Wendy Wark’s blend.
Their flours are all milled superfine. I haven’t used this flour in this recipe, but I am inclined to think it should be fine.
Hi,
Excited to try this recipe!
You mention in your “Gluten free dough rising tips” to, “Allow the dough to rise overnight in a cool spot. Slower rising in cool temperatures can make your dough stronger and rise better”. Is this for the first or the second rising?
Thank you!
Hi Ann, This is for the first rising. Thank you so much for your note.
Just found this recipe. I found Gee Free Puff Pastry in the Freezer at our local Schnucks Grocery Store and it s pretty good. At least my gluten free family snarfed it down happily. I cut it in small squares and added blueberry filling, then folded and sealed opposing corners.
I haven’t seen the Gee Free pastry dough yet. It is good to know it works well in your recipe.
Why not order it online? I tried a vegan option last night and it turned out OK. I think the vegan butter was ok, but I wasn’t sure how “frothy” the yeast/milk should be, and I think I rushed it. How long does it usually take? I just started through the recipe, and assumed that because there were no timing instructions, it was something that should take a few minutes. Novice pastry maker here 🙂
Hi Suzanne, thank you so much for writing. I should clarify a bit. I wrote that post a long time ago when I first started blogging. You do want your yeast frothy before mixing it in. It should be fine as this pastry isn’t the “puffy” type. I will clarify the directions too. Thank you.
These sound amazing! Two questions. Which yeast do you use and can I use Earth Balance Buttery Sticks in place of regular butter as I am dairy free.
Hi Lorraine, I haven’t tried Earth Balance in this recipe. If you try this, will you please let us all know how it turns out? I am sure it would benefit other readers as well. Thank you 🙂
I have the exact same question. By chance did you try the Earth Balance butter?
I haven’t heard back about the Earth Balance butter and how it worked Mich.
Darn! Looks like I’ll be the guinea pig then ;p I substituted it in a cookie recipe last week and it worked beautifully so I have high hopes. I’ll definitely let you know how it goes. I’ll be making them for my daughters Harry Potter party on March 7th so I’ll post someday after that 😉
Hello. Can’t wait to try this recipe. A couple questions. What brand GF flour did you use? And did you add xanthum gum even if the GF flour had it?
Hi Lynn,
I used Authentic Foods Bette’s Featherlite gluten free flour. This blend doesn’t contain xanthan gum so I did add some. Take care. Sandi
Can’t wait to try this recipe. I’m baking for my teenage grandson who is struggling with his new diet. I made your French Apple Cake and it was delicious! Thank you.
Hi Susie,
I am so glad he liked these. My kids are teens too and I know how hard it can be. Everything on my blog, with the exception of a few spicy dinner recipes, is “teen” approved so please encourage him to come and explore the recipes. He is old enough that he can make any of these himself 🙂
Sandi, Can your puff be frozen? I would love to be able to freeze and pull out few treats later.
I
Hi Phyllis, I don’t see why not, but I haven’t tried it. My family ate these way to quickly to try freezing. If you do freeze some, please come back and let us know how it worked. Your feedback can help a lot of other readers 🙂
Want to try these but have a question. You let the dough rise to start with and then again after it has been rolled with butter three times. That time you put it in the frig. You said to return it to the frig. Does it go in the frig the first time after it is mixed? I would have left it out for the heat of the room to let it rise. So help me please. In the frig or out of it. You just say let it rise but later it sounds like it had been in the frig the first time. Thank you so much.
Hi Judy, I know there are a lot of steps and it can be confusing. I let the dough rise in the refrigerator before the initial rolling. I suspect letting the dough rise out of the refrigerator might be better with gluten free dough as my dough didn’t get as big as I had hoped. Then I put it into the refrigerator again after the rolling three times. The butter needs to stay cold for when it goes into the oven to get it to flake up. (I hope this makes sense.)
I can’t wait to try these out! I have been wanting some sort of flakey pastries for over 3 years now. =) Thanks so much for sharing this! I’m going to try some kind of chocolate filling, any advice?
Thank you. I am thinking nutella may be really good in these 🙂
Has anyone tried this using Ghee?
Not that I know of Sandy. If you do try it, please let me know how it turns out 🙂