
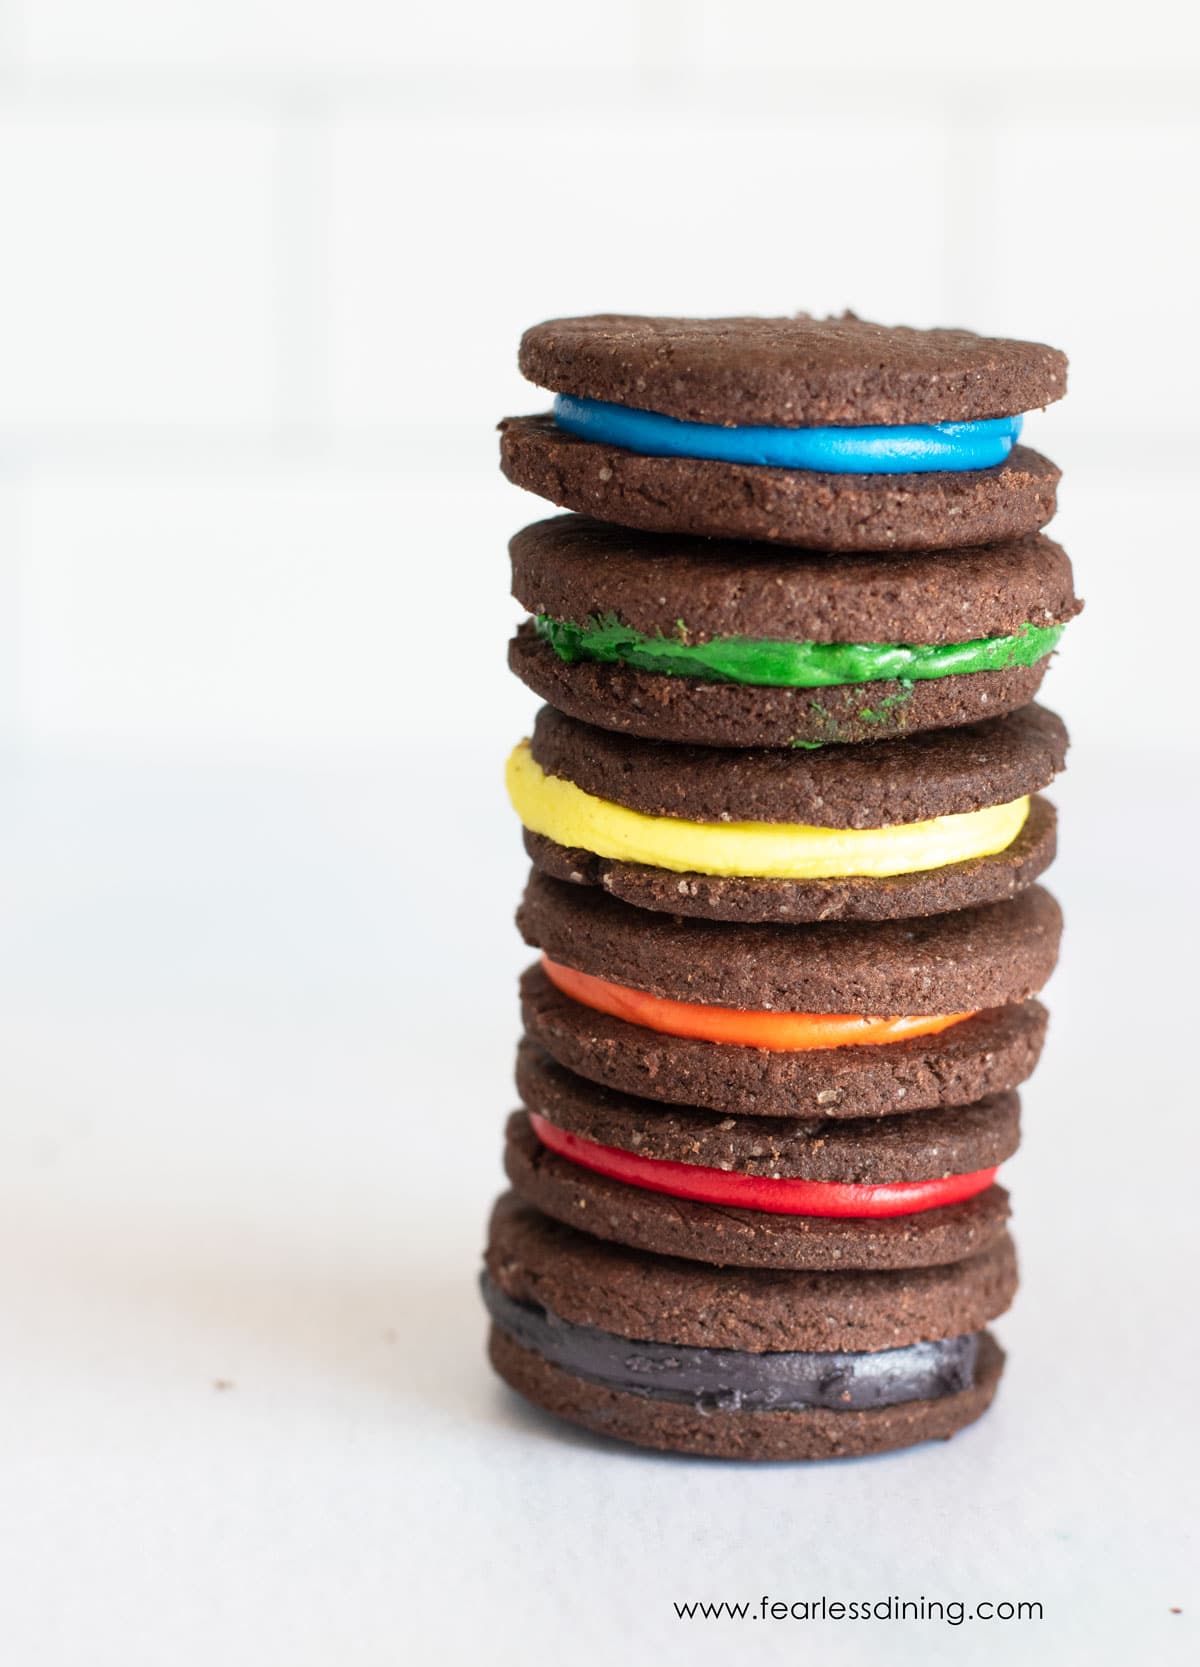
These crisp gluten-free sandwich cookies are so much fun to make, and even more fun to eat. The chocolate cookies bake up with a satisfying snap. Whether you go classic with white filling or pipe in a swirl of rainbow buttercream, every bite is rich, chocolaty, and just the right amount of sweet. Use your favorite cookie cutters to make them extra festive for holidays, birthdays, or baking days with the kids.
This post may contain affiliate links. Please read our Disclosure Policy.
Gluten-free sandwich cookies have always been one of my favorite cookies. How is it possible I have never made a sandwich cookie? I have made lots of whoopie pies and things more cake-like, but never a real-filled cookie that resembles an Oreo.
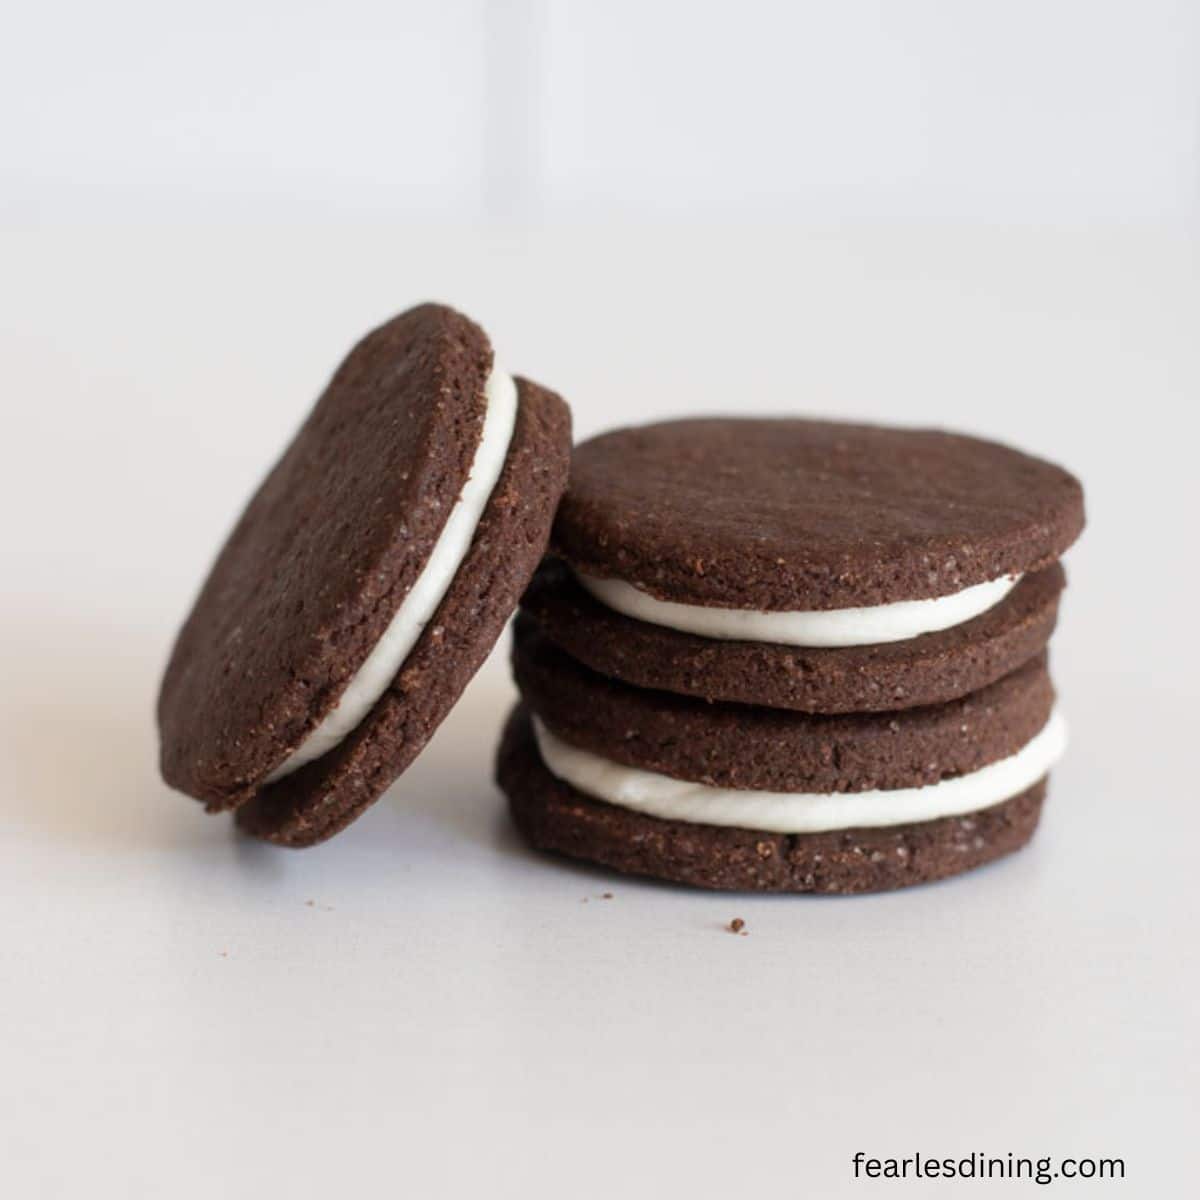
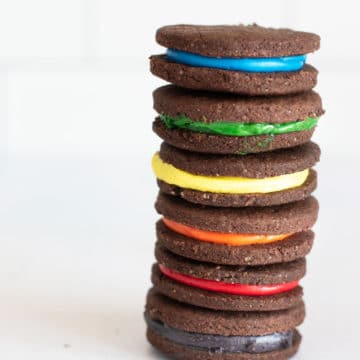
My kids were pretty excited about this gluten-free cookie recipe, too. These cookies are crisp like an Oreo, and the thick vanilla filling is so good. These gluten-free chocolate wafers are the perfect vessel for my thicker rainbow-colored buttercream frosting. If you aren’t in a colorful mood, you can easily use white frosting like the original Oreos.
If you love to bake, check out all of my delicious gluten-free cookie recipes!
Recipe Testing Tips:
I tested this recipe multiple times over the years. One of the most important tips I can share is that it’s okay and normal to make mini moisture adjustments to your cookie batter. Every gluten-free flour blend has a slightly different moisture need. Make adjustments 1 tablespoon at a time. If the cookie dough is too wet, add more flour, and if your dough is too dry, add more butter.
Ingredient Notes and Easy Swaps:
For the full list of ingredients and amounts, please go to the recipe card below.
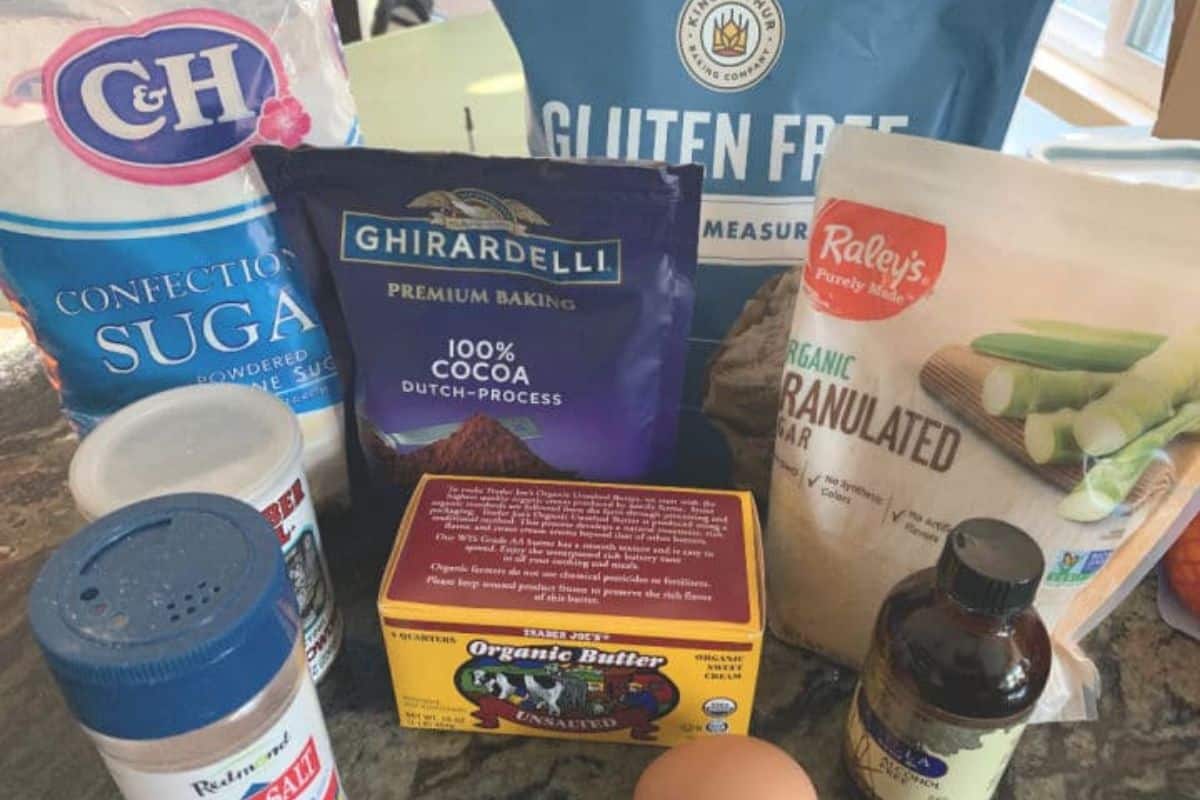
- Gluten-Free Flour Blend – I tested this recipe using Bob’s Red Mill 1 to 1 Gluten Free Flour Blend and King Arthur’s Measure for Measure Gluten-Free Blend. Both worked well. I added one tablespoon of additional flour using the Bob’s blend.
- Cocoa Powder – I tested this recipe with Anthony’s and Ghirardelli cocoa powder. Both are gluten-free and have rich chocolate flavors.
- Baking Powder – Use aluminum-free baking powder or baking soda. If you use regular cocoa powder, use baking soda. If you use Dutch process or black cocoa powder, use baking powder.
- Eggs – Use size large.
- Butter – I recommend using unsalted butter.
- Food Coloring – If you’re coloring the frosting, you can use either natural or regular brands of food coloring, depending on your personal preference.
For even more tips, check out my Gluten-Free Cookie Troubleshooting Guide and Favorite Cookie Tools!

A Note From My Kitchen
I first created this gluten-free sandwich cookie recipe back in 2017, before store-bought gluten-free Oreos existed. My kids missed Oreos, so I set out to make a cookie that had the same crisp chocolate bite and creamy filling. These are the real deal, thin, slightly crunchy, and packed with chocolate flavor. Over the years, we’ve turned them into colorful cookies for birthdays and frosted holiday shapes for cookie swaps. They also make incredible ice cream sandwiches when baked slightly larger!
How to Make Gluten-Free Sandwich Cookies (Step-By-Step)
Email This Recipe To Me!
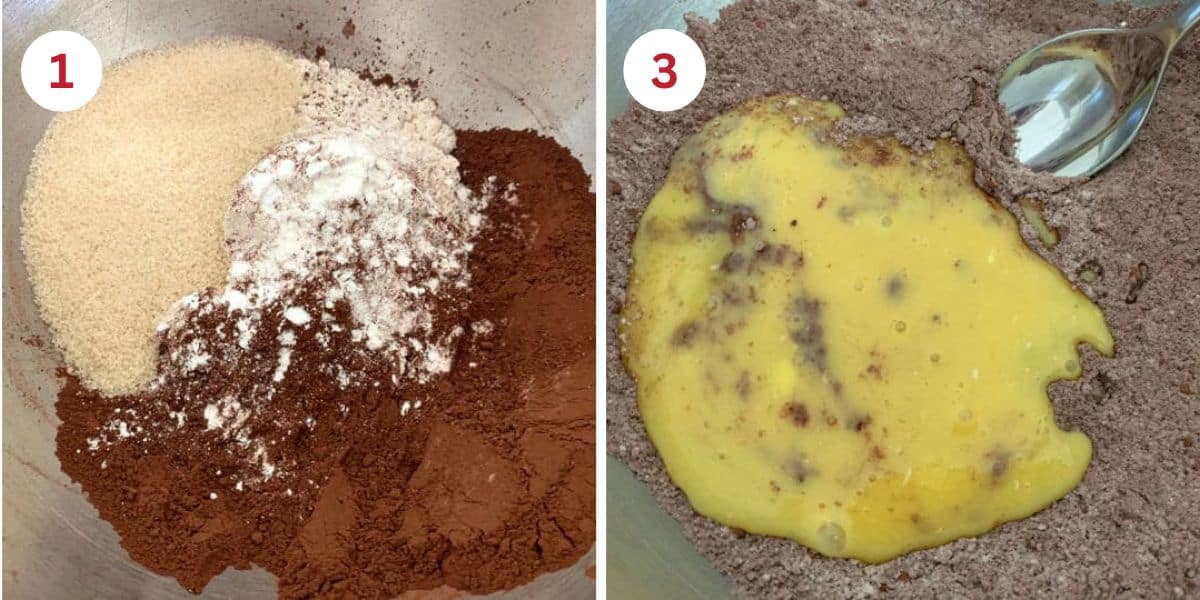
Step 1: Add your dry ingredients, including the flour, cocoa powder, sugar, baking powder, and salt, to a large
Step 2: In a smaller bowl, add your wet ingredients, including the partially melted butter, eggs, and vanilla, and mix well with a large spoon.
Step 3: Pour the wet ingredients into the dry ingredients. Mix into a soft cookie dough. If you notice the dough is too dry, add melted butter, 1 tablespoon at a time. If the dough is too wet, add more flour 1 tablespoon at a time.
Read my guide Why Gluten-Free Flour Blends Vary for more information about why each has different moisture needs.
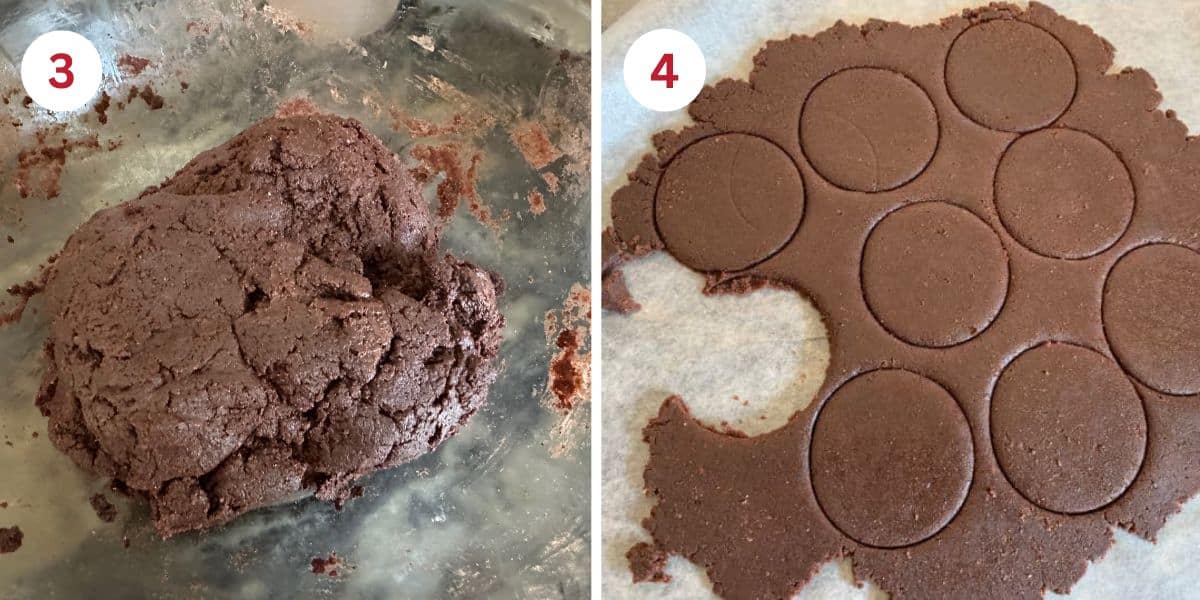
Step 3: Wrap the dough in plastic wrap and chill it for 45 to 60 minutes.
Step 4: If you chilled the cookie dough, preheat your oven to 350°F. Lay out a silicone mat and place your chocolate cookie dough on top. Place a piece of wax paper over the dough and use a rolling pin to roll the cookie dough to a thickness of 1/4 inch.
Grab your favorite cookie cutters. I used a small round cookie cutter to cut out these cookies.
Step 5: Bake the cookies on a parchment-lined
Step 6: Remove the cookies from the oven and place them on a cooling rack. Using parchment paper, you can easily slide the cookies onto the cooling rack. Allow cookies to cool completely before adding frosting to the middles.
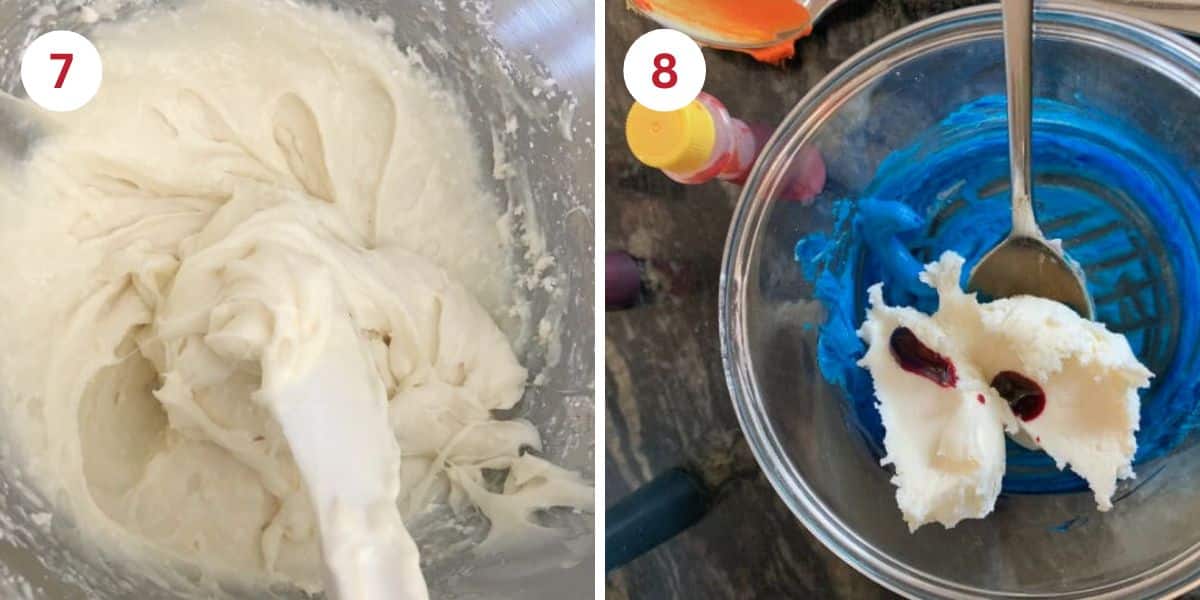
Step 7: Make your frosting in a standing mixer with a whisk attachment, using room-temperature butter, vanilla, powdered sugar, and a small amount of water. The measurements are in the recipe card below. Again, if you are dairy-free, use a plant-based butter.
Step 8: To make the rainbow-colored frosting, divide your frosting into small bowls. Add a few drops of food coloring to each bowl. Mix and adjust the color to a darker shade if you like. You can skip this if you are going to have vanilla centers.
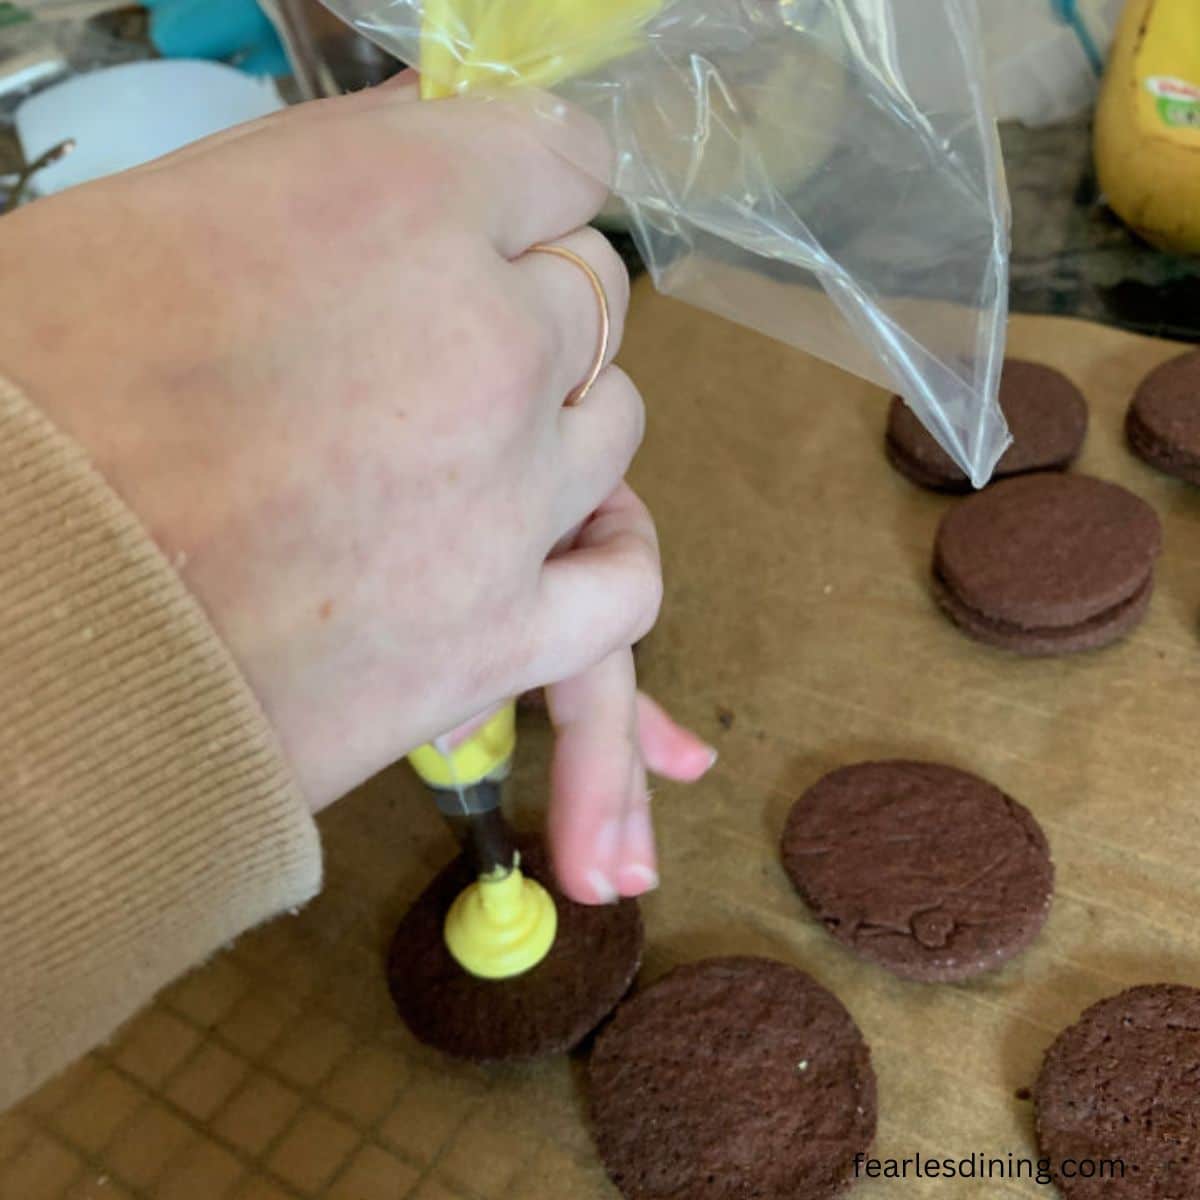
Step 8: Use a large spoon to fill a pastry bag with frosting and pipe it onto chocolate cookies, topping each cookie with another cookie to make a sandwich cookie. I used a regular round tip, but you can also use a star-shaped frosting tip.
Tips for Perfect Gluten-Free Sandwich Cookies:
- Don’t skip the chill time because cold dough rolls and cuts more cleanly.
- Use parchment paper or a silicone mat for baking to prevent sticking.
- Let cookies cool fully before adding frosting to avoid melting.
Storage and Freezing Tips:
Store cookies in an airtight container. They will keep fresh for up to 3 days. Gluten-free cookies tend to spoil quickly, so if you don’t finish them, I recommend freezing them in a freezer-safe zipper bag.
Frequently Asked Questions:
Yes, the chocolate cookie dough is a great base for a cut-out cookie recipe.
Yes! Wrap the dough tightly in plastic and freeze it for up to 2 months. Let it thaw in the fridge overnight or at cool room temperature before rolling and cutting.
Of course, this is a great time saver.
More Gluten-Free Cookies Recipes:
We are huge cookieholics. Try some of my family’s favorite cookie recipes:
Love This Gluten-Free Sandwich Cookie Recipe?
💬 Did you make this gluten-free recipe? I’d love to hear how it turned out and which pan or flour blend you used! Your feedback helps others (and helps me keep improving these recipes for you). ⭐⭐⭐⭐⭐
Gluten-Free Chocolate Sandwich Cookies (Kid-Approved)
Ingredients
- 1 ½ cups gluten free flour blend *see note
- ½ cup cocoa powder * see note
- ⅛ teaspoon salt
- ½ teaspoon aluminum-free baking powder
- ½ cup cane sugar
- 1 large egg
- 1 teaspoon pure vanilla extract
- ½ cup unsalted butter partially melted
Frosting
- 3 ½ cups powdered sugar
- ½ cup unsalted butter room temperature
- food coloring
- 3-4 tablespoons of water * depending on how stiff you want your frosting
Email This Recipe To Me!
Instructions
- If you are mixing these by hand, add the dry ingredients, including the cocoa powder, sugar, baking powder, and salt to a large mixing bowl. Use a whisk to blend. In a smaller bowl, add the melted butter, eggs, and vanilla extract. Whisk to blend.
- Pour the wet ingredients into the dry ingredients and mix into a soft cookie dough.
- Remove the dough and wrap in plastic wrap. Refrigerate the cookie dough for 30-45 minutes.
- Preheat the oven to 350°F. Use the bake setting, not convection bake. The cookies will bake more evenly on a bake setting.
- Remove the cookie dough from the refrigerator and remove from the plastic wrap.
- Place the dough on a silicone mat. Cover with a piece of wax paper and use a rolling pin to roll the dough to 1/4-inch thickness.
- Use your favorite cookie cutter to cut out shapes.
- Place a piece of parchment paper over a cookie sheet. Place each cookie shape on the baking sheet.
- Bake the cookie shapes for 8-10 minutes. The actual baking time can vary depending on how thick cookies are, and the size.
- Remove the cookies from the baking sheet and place on a cooling rack. Let the cookies cool completely to room temperature before adding the frosting middles.
Frosting
- Add the powdered sugar, butter, and water to the standing mixer with a whisk attachment.
- Mix on low speed until the powdered sugar is incorporated.
- Divide the frosting into several small bowls (depending on how many colors you make).
- Add a few drops of food color to each bowl. Mix well.
- Take a pastry bag and a tip, and add one color of frosting to the bag. Pipe it onto a cookie then add another cookie on top to make the cookie sandwich. I used a round tip, but you can also use a star frosting tip shape if you prefer.
Notes
- I have tested this recipe with King Arthur Measure for Measure GF and Bob’s Red Mill 1 to 1 GF blend in this recipe. Other blends will work, but you may need to tweak the moisture level by adding a little more flour or melted butter.
- If your gluten-free flour blend doesn’t contain Xanthan Gum or Guar Gum, please add 3/4 teaspoon.
- If you use regular cocoa powder, use baking soda. If you use Dutch process or black cocoa powder, use baking powder.
- To make this recipe dairy-free, substitute the butter for vegan butter.
- These cookies will keep up to 4 days in an airtight container, or up to 4 months in the freezer. Freeze in a freezer-safe container or zipper bag.
SPECIAL NOTE
Please know that every gluten free flour blend has a different starch to grain ratio. If you use a blend I didn’t test, my rule of thumb is to add more flour if your dough or batter is wet and add more liquid if the dough or batter is too dry!
Nutrition
Nutrition Disclaimer
Nutritional information is an estimate provided to you as a courtesy. You should calculate the actual nutritional information with the products and brands you are using with your preferred nutritional calculator.
